Best Selling Acrylic Painting Instructional Book

Zen Houses Online Workshop

Zen Painting Online Workshop

Showing posts with label tutorials. Show all posts

Thursday, December 29, 2016

Texture Tutorial-A Free Exercise From My Book!

Hello Friends!  I hope you had a great holiday with family and friends!  I'm still coming down from my sugar and family fun high!  I have lots of new blog posts planned for the coming days but first, I wanted to share an article I wrote for my friends at Cloth Paper Scissors where I have been  'moonlighting' as a guest blogger and soon to be guest columnist in 2017 for the magazine!   This tutorial has a clickable link that includes a downloadable tutorial taken straight from my book,  "Abstracts in Acrylic and Ink".  If you haven't received it yet or wondering about the projects included--here's a variation of one of them!


Some of the supplies you'll need include:  Silks Acrylics  (any colors),  Ampersand Claybord , High Powered Heat Gun,  Golden's Tar Gel (or Self Leveling Gel, or Pouring Medium), and to get the black marks on the bubbles, Staz on Ink.  You'll see in the project featured I also use a bit of Titanium White and a Brayer.


Let's Get Started:  


Do you have an affinity for texture? I know I do. I love it so much that I’ve come up with a couple of classes where texture is the star of the show. There’s just something about a piece of art that has imperfections or clearly has an uneven surface that begs to be touched.
I have long used many gel mediums in my work but when you’re teaching a one day class, it’s hard to use many of the commercial mediums to teach with because they simply won’t dry in time. I came across this technique by accident when I was trying to speed my painting for a class I was teaching, with not just a heat gun, but a heat tool—you know the one that looks like it should be used in a factory or welding shop? Needless to say, it didn’t just heat up my gesso/gel medium—it also burned it and bubbled the surface. The look was actually fascinating.   

......Read on for the rest of the article and to download the tutorial!


**********************************************************************************************************************

I'm so thrilled, my book is trending #1 in Mixed Media and on the Hot New Release list!  If you haven't bought it yet,  you can get it a variety of different ways!   

Through Amazon by clicking this link or image:


Or, if you'd like a signed copy of my book, I'm offering 3 different package deals that you can check out here!


Most major book stores will be carrying it, too!  If your local shop doesn't carry it yet, please recommend it to the manager/owner!!  

Here's a few of the reviews that have come in so far!  (BTW...after this week, I'm going to try not to read the reviews...lol as I know someone is going to not love it and I don't want the bad reviews to hurt my heart..but in my head I know it's coming).  For now, I'm going to ride the high and pat myself on the back for doing the best job I could do for the place I was in creatively, and so far...that job looks like it's resonating with artists who have bought the book!   Thank you all for the emails, texts, and Facebook posts!  Keep em coming if you have bought the book yourself! I love seeing them!     I'm already thinking of what's next and there will be a next!! :))

 Order this now! Fantastic book.I buy many, many art books and mostly mixed media oriented topics -- and I am picky, and I don't often review books. But this book is worth more than 5 stars to me. Everything about it is wonderful and I think it is a perfect combination of attractive (to me) projects and techniques. Although it is step by step technique, it isn't a "make this" crafty project book nor do I find myself not finding the techniques approachable. I am excited to dive in and see where it takes me. Wow is all I can say --- and I hope to someday take an in-person workshop with Jodi.  (M. Shea)

It is a beautiful book, the pages are fantastic qualityI have been eagerly awaiting the arrival of this book since I pre-ordered an age ago. It arrived yesterday and I couldn't wait to delve in. It is a beautiful book, the pages are fantastic quality, full of vibrant color. I have been following Jodi for quite a few years now and have several of her online courses. I had the good fortune to attend one of her workshops in Florida last year, which was amazing. She is a lovely lady who very generously shares her techniques and unique ideas with everyone. Her playful style is super easy and there are no mistakes....everything is an opportunity. Love this book. Super inspirational. Buy it, you won't be disappointed!  (M. Scales)

5.0 out of 5 starsAwesome Book For Beginner to Advanced"Highly Recommended"There's an old saying, "when the student is ready, the teacher will appear". This is my book-of-the-year! I'm a trained, skilled artist and this information has taken my study to a new and exciting level. A great tool for those beginning and experienced.  (V. Phillips)

What a wonderful book. Was delighted when it came. Easy to follow with great illustration. The author has years of experience teaching and it shows. I highly recommend this book for beginners to advanced, something for everyone.  (D.Belica)


Wednesday, February 19, 2014

How To: Demonstration on Finishing Your Artwork

Three posts in a week and more to come! Maybe I'm getting into a new groove which would be great!

Today, I wanted to share with you a short demonstration on a question I seem to get all the time on finishing my work.   In this video I show you what I do and explain why, but do know that this is just my way of doing things and that there are probably other products and other ways of applying the final application.  Many roads lead to the same destination, always.      I did happen to notice I miss spoke on the Liquitex products I used so I will share the list on the bottom of this post.  Hope this helps answer some questions! Keep them coming, if I can do other short demonstrations in the future with your 'burning' question, I will. Leave me a comment today and let me know what you  would like to learn.


The Products I used in this video are:  Krylon Low Odor Gloss Spray Varnish,   Liquitex Gloss Varnish,  Liquitex Satin Varnish,  Brush from Lowes (soft finishing brush).


https://www.etsy.com/listing/179940997/contemporary-circle-shaped-abstract-full

https://www.etsy.com/listing/179940997/contemporary-circle-shaped-abstract-full
This piece and more new art are now in my shop!
Stop by and take a look by clicking HERE.

Thursday, January 16, 2014

Just Draw.

Just some fun pointers on improving your drawing skills around portraits:)  


Stay tuned....Extreme Portraits coming soon!

Tuesday, January 07, 2014

How to Draw Lip Digitally!


I've been thinking about doing some new things lately, you know how it is in the New Year...your mind races with all sorts of amazing ideas and your spirit is renewed with the energy driven by possibilities....well a couple months ago I bought a new drawing tablet with the idea of working on some stencils for a company...and I did do some designs but nothing was coming to me that we could use for a set.  I'm still chewing on it. I think I have stencil block for some reason.

While chewing on ideas, I started playing around with photoshop, doing some designs..but I had more ideas just not the time to make them happen until, well, the New Year appeared and all of a sudden I decided to turn a new leaf and just do what had been on my mind.

One of the ideas is to share more tutorials here on the blog, hopefully weekly in some way, shape or form.  I still have some of my reactionary ways hovering inside of me...I'm trying to move to a more proactive self but that's still a work in progress. By that, I mean, I'm not ready to say that we are going to have a Tutorial Tuesday here and I already have a years worth of tutey's planned...but I did pencil in some ideas into my trusty new planner...and today is the first of them.
whooohooo:)))

Here is a short tutorial on drawing lips digitally using the program Sketchbook Pro.  I am VERY new to it...like I've had it about 2 weeks and used it about 4 times, so while I don't know everything about it, I have pressed a bazillion buttons and know basically how it works. 
The cool thing is I can see potential for new classes and also simply a great way to practice drawing and design.
Maybe once I just let go and try new things, my original purpose for the program (to design stencils) will flow more easily.

All right, here ya go...hope you enjoy!


*******************
If you are in the neighborhood, stop by my Etsy shop and see what's new! I uploaded several new paintings this week that are amazingly vibrant and super happy.  Take a look!

https://www.etsy.com/shop/JodiOhl

Don't forget, only a few more days left to save on my classes over at Creative Workshops!!

http://store.creativeworkshops.me/On-Sale_c_12.html

I also have a newly released workshop coming up at Creative Workshops called Art Journal: The Book.   The class opens January 27th and is ONLY 22.00!

Registrations are zooming in for classes at Art Is You already!!  Take a look at what I'll be offering this year in Dixe and in Stamford:)))  Hope to see you there!


http://www.art-is-you.com/mysitecaddy/site3/jodiohl-pod-tastic.htm

 Till we meet again! 

Jodi

Carla Sonheim-Guest blogger!

 Today on the blog, we have a special guest blog and tutorial from one of my 'online friends', Carla Sonheim!  For those of you who haven't had the pleasure to 'meet' her, I wanted to introduce you to Carla Sonheim, an illustrator and online art instructor known for using innovative exercises and techniques to help students of all levels embrace a more playful approach to creating art. She is the author of "Drawing Lab for Mixed-Media Artists: 52 Creative Exercises to Make Drawing Fun" and "The Art of Silliness: A Creativity Book for Everyone."

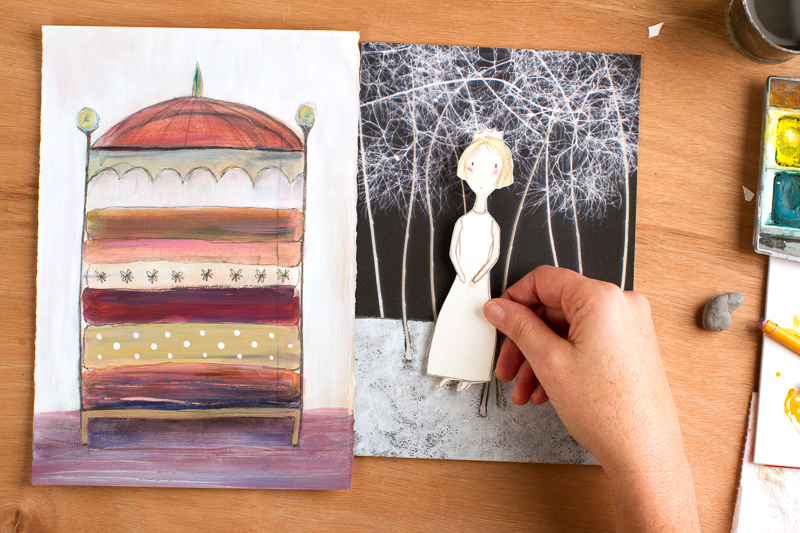
For the last three years her focus has been on creating engaging online art classes, where she teaches and also presents well-known guest artists. She made this Paper Doll tutorial in anticipation of her next online class, "2014: Year of the Fairy Tale," which begins January 20, 2014. You can find our more about Carla and her art and classes here:

Info for "Year of the Fairy Tale" Online Class: http://www.carlasonheim.com/2014-the-year-of-the-fairy-tale/
Link to Carla's Other Online Classes: http://www.carlasonheim.com/store/
PD

Here is a quick and fun way to make original paper dolls... a perfect thing to do with your kids or to nurture the kid inside you... because we're never too old to play with paper dolls!

Have fun!

Join her next online class starting soon:
"2014: Year of the Fairy Tale.

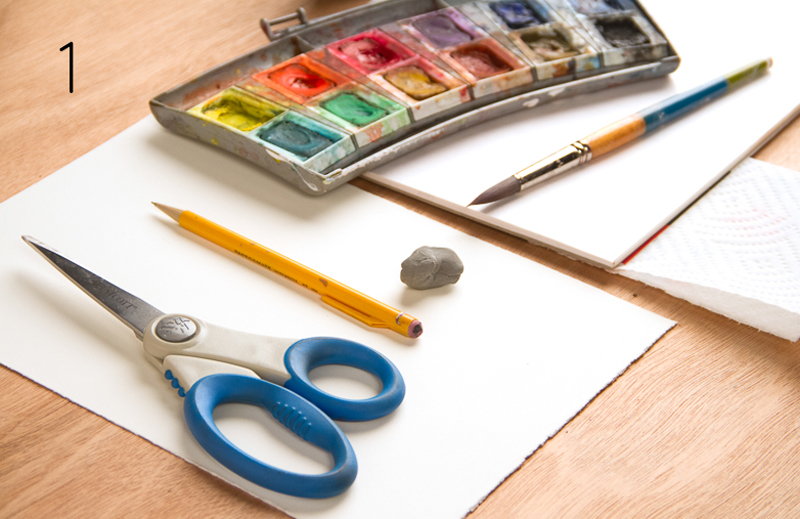
 Supplies Needed - a small watercolor set - #12 round paintbrush (or similar) - 8"x10" sheet of 140# hot press watercolor paper (or similar) - a regular pencil - an eraser (I like kneaded rubber erasers) - scissors __________________

VIDEO TUTORIAL


STEP BY STEP

PDstep1

1. Gather your supplies.
PDStep2
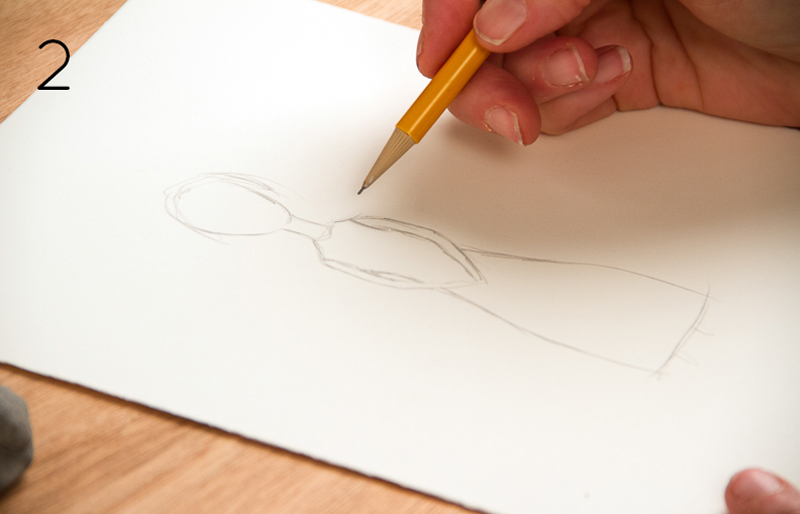
 2. Lightly sketch in an outline of your doll. Keep your hand loose, and try not to worry about exact proportions (sometimes the most charming characters emerge when we let go of perfection!). PDStep3
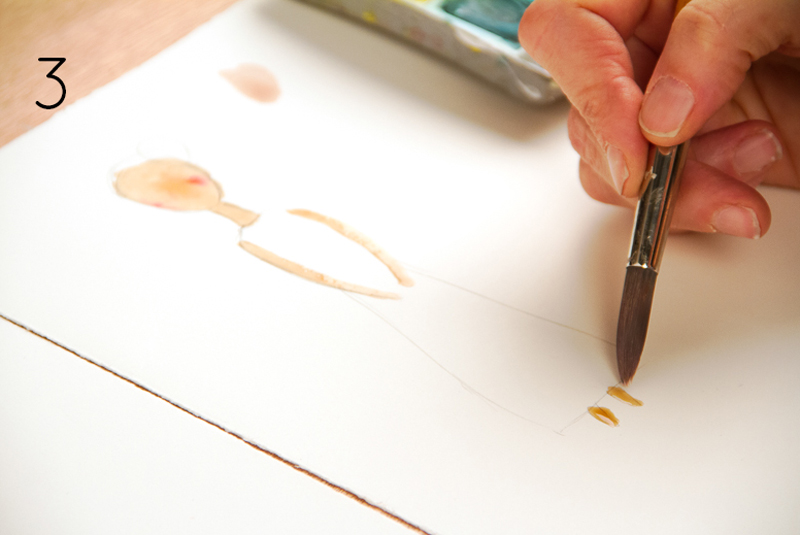
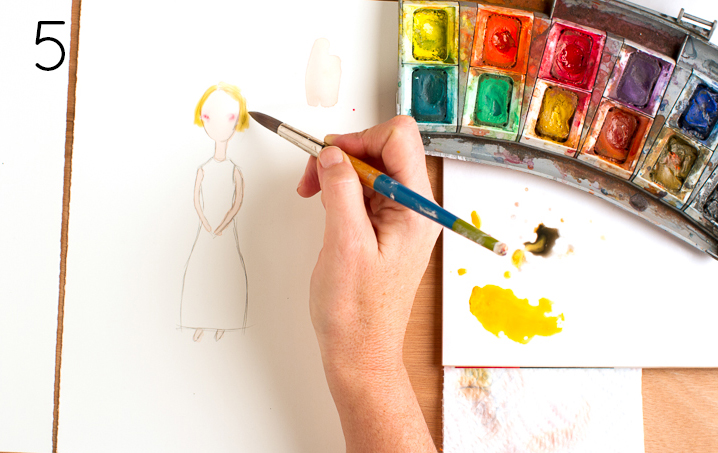
3. Using lots of water, mix up a color to use as the skin tones. Paint face, arms and feet. When face has had a chance to dry, get some red pigment on your brush and "dot" it into the watercolor quickly. The color should begin to spread out a bit for some nice rosy cheeks.


DPStep4

5. Paint in some hair; let dry completely. PDStep6
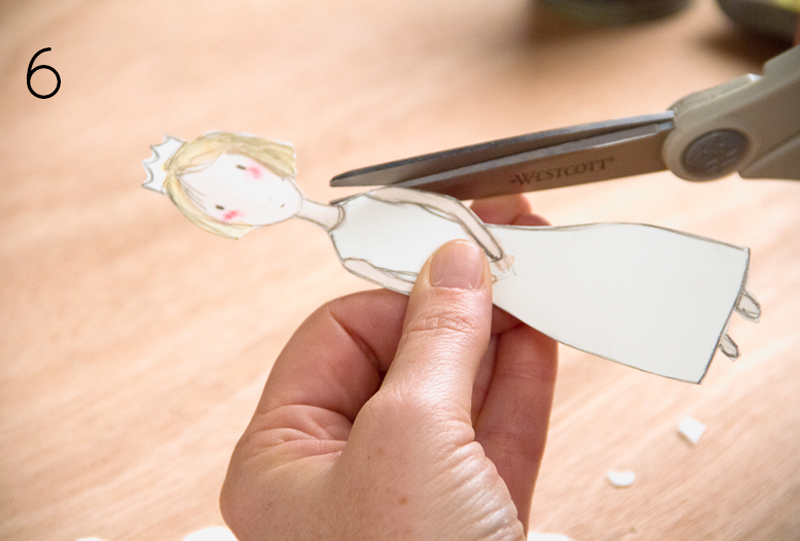
 6. Cut out your paper doll, and... PDStep7
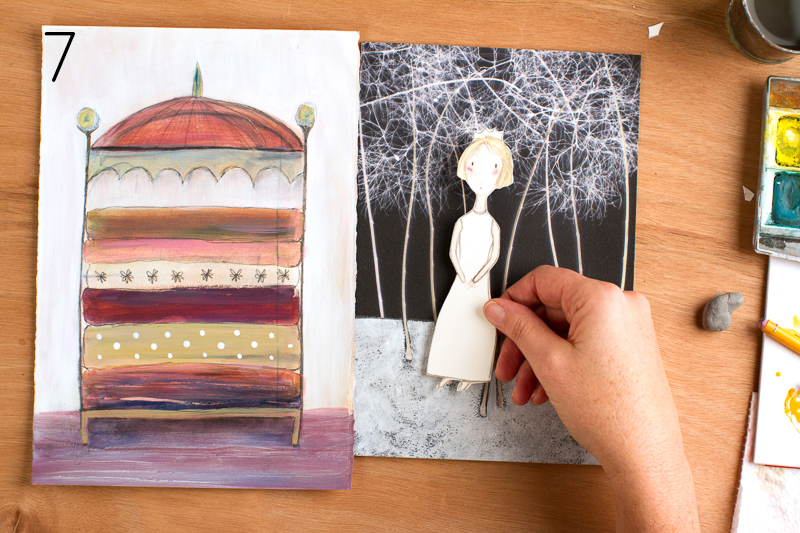
 7. Play!


BIO

____________ © 2013 Carla Sonheim (www.carlasonheim.com)


Carla Bio: Carla Sonheim is a painter, illustrator, and online art instructor known for using innovative techniques to help students of all levels embrace a playful approach to creating art. She is also the author of the “Drawing Lab for Mixed Media Artists: 52 Creative Exercises to Make Drawing Fun.” Carla’s paintings have been showcased in many galleries nationwide, as well as private and corporate collections. For the last three years her focus has been on creating engaging online art classes, where she teaches and also presents well-known guest artists. More Free Tutorials: http://www.carlasonheim.com/tutorials/ Next Online Art Class: 2014: Year of the Fairy Tale Link to Carla's Online Classes: http://www.carlasonheim.com/store/ -----------------------------

Wednesday, October 16, 2013

One by One They Fall

Hello friends! So much going on that I barely know where to begin, other than I know I just need to begin again with something.
  
 Inspired by my trip to CT last week and the AMAZING trip up the state to our destination of Mystic on a side road trip after Art Is You,
 
 I wanted to share a project with you that I previously did for Luminarte in September.     Even though this is a post featuring a past project, it is in perfect time for these chilly but cozy fall days.    I'll be back later this week with SEVERAL exciting announcements and some recaps on my latest adventures.
(You can be sure to be one of the first to hear the announcements by signing up for my newsletter HERE)


 Okay so now onto the project with a little slideshow Tutorial:


If you'd like more information on the project and supplies used, please visit our blog post over at Luminarte:)
Thank you for visiting today!  I'll be back soon with more fun artsy news and tutorials for you!

In the meantime, please visit my shop to see what's new~!

---Jodi Ohl